English French German Spain Italian Dutch Russian Portuguese Japanese Korean Arabic Chinese Simplified
Tampilkan postingan dengan label Fix Error. Tampilkan semua postingan

Rabu, 12 Desember 2018

SHARPKEYS 3.8 ( Remap Keyboard PC / Laptop )

SharpKeys is a Registry hack that is used to make certain keys on a keyboard act like other keys. For example, if you accidentally hit Caps Lock often, you could use this utility to map Caps Lock to a Shift key or even turn it off completely. This official release includes support for up to 104 mappings, an extensive list of available keys, and a “Type Key” option to help when managing mappings. As it relies on internal support within Windows NT, Windows 2000, Windows XP, Windows Server 2003, Windows Vista, Windows 7, Windows 8, or Windows 10 you must be running one of these OS’s for this Registry hack to work.

With the release of version 3.8, I’ve recompiled the most recent code that has been posted to the GitHub project. This version includes some bug fixes, “theoretical” support some hardware keys from HP and Lenovo, and support for high DPI displays.
As always, I encourage anyone interested in working on the code to visit http://www.github.com/randyrants/sharpkeys for more project changes.
Download SharpKeys 3.8: MSI | ZIP | requires .NET Framework 4.0
repost from :
http://www.randyrants.com/2018/10/sharpkeys-3-8/

Kamis, 06 Desember 2018

Memperbaiki LCD Laptop / Monitor gambar Klise atau Negative Film


Edisi dapet servisan unik lagi. monitor laptop tampil gambar seperti negative foto / klise. niatan awal mau diganti aja LCD-nya.tapi waittt....setelah jalan2 di mbah google, ketemu deh solusinya, kurang lebih begini :

1.  Ambil LCD panel dengan cara lepaskan semua baut yang menempel di frame LCD laptop
2.  Setelah terbuka, tanpa melepas kabel fleksibel, nyalakan laptop
3.  Di belakang panel layar, ada PCB panel LCD, cari komponen yang  berbentuk potensio, pada board PCB panel biasanya di beri kode VR ( variabel resistor)
4.  Coba putar pada ujung VR tersebut ke kanan atau kekiri, pada tampilan layar seharusnya akan terlihat perubahan, entah gambar normal, atau tambah berantakan.

5. Jika tampilan menjadi normal, berarti problem solved. jika tidak, silakan lanjut ke step berikut
6. Jika tampilan menjadi berantakan atau sudah tidak bisa di stel melalui VR, kemungkinan besar komponen VR-nya rusak atau nilai resistansinya sudah menurun,
8.  Solusinya adalah ganti VR dengan yang baru, maka seharusnya gambar pada layar akan normal kembali
9.   Jika Sparepart VR tidak ada, bisa juga diganti dengan menggunakan resistor SMD dengan nilai 104k
10. Selamat mencoba, harus teliti dalam pengerjaan,  jika salah bisa fatal erorr, jika masih saja gagal, solusi terakhir adalah mengganti komponen LCD Panel secara keseluruhan.

11. Selesai.Good Luck.


menyempurnakan artikel dari :
http://miuzcom.blogspot.com/2015/02/cara-perbaiki-lcd-laptop-gambar-klise.html


Senin, 19 November 2018

How to Fix App Not Installed Error on Android Phone?

Fix the annoying problem of App not installed error on Android with this simple solutions and install the problematic app.
Android system is great when it comes to using Apps and enjoy seamless smartphone experience. Many times you may get annoying messages while you install Apps on your device, especially apps from ‘unknown sources’. One such message is ‘App Not Installed’ or ‘Application not Installed’. And it is a common issue faced by Android KitKat, Lollipop, Marshmallow etc. There are mainly 3 possible reasons for the error of installation.
  1. The App build may have corrupted or some of the core files have been modified knowingly or unknowingly.
  2. Android Manifest is the set of permissions has a lot of permissions where an error might have occurred.
  3. Gradle file – The problem might be in the file itself. Just check the minimum SDK version is suitable for your device.
  4. Installing an unsigned app could also result in this error.

Methods to Fix App Not Installed Error

Here are some of the best solutions to fix Application not Installed error on Android.

1. Change App Codes

You can make some changes in the version code or SDK to do so.
Step 1: Download APK Editor app from Google Play Store.
Step 2: Now open APK Editor App and click on ”Select APK from APP” or “Select an Apk File”
APK Editor
APK Editor
Step 5: Now look for the App and click on “common edit”.
Step 6: Here change the Install Location to any other option whichever applicable for your device. You can also change the Version Code of the App to any older one which is supported by your device.
Step 7: Apply the changes in APK Editor App.
Step 8: Uninstall any similar pre-installed app and install the modified Appfrom APK Editor.

2. Sign the Unsigned App

  1. First, download and install ZipSigner from Google Play Store.
  2. Launch the app.
  3. You will see the app dashboard. You will see the dashboard,     
  4. Now, tap on Choose input/output and locate the apk file
  5. Then tap on ‘Sign the file’.
  6. Let the process be complete and then install the signed apk.

3. Reset All the App Preference

  1. Go to Settings on your Android device.
  2. Open Apps or Apps manager.
  3. check for All Apps.
  4. Tap on the menu icon.
  5. Click on ‘Reset App Preferences’.
    Reset App preferences
    Reset App Preferences

4. Avoid Installation from SD Card

If the APK is downloaded or if you are trying to install it from external mount than in many cases it would be not possible due to contamination of the file. The installer may not completely parse the package from an mounted storage.
The best solution, in this case, is to download the APK onto your internal storage and try installing the App. Your mobiles package installer will accept the files without any errors.

5. Use an older version of the App

Any latest version of the App may not support your device due to system limitations. Just download any older version of the App. If this works then your device is not capable to read the latest APK.

6. Clear Data and Cache of Package Installer

  1. Open setting on your Android device.
  2. Look for the option called Apps or Manage apps and tap on it.
  3. Check for the Package Installer App under system Apps
  4. You will find two option of Clear data and Clear cache. (For Android Marshmallow 6.0 users check for option Storage to clear data and cache)
  5. Clear the data and cache to solve the problem.

7. Allow Apps from Unknown Sources

This is the most common issue which could cause the error on mobile or tablet.Go to Settings → Security → Unknown Sources. Enable Unknown Sources. And then try installing App.

8. For Root Devices

If you have a rooted phone than the success rate increases manifolds.
  1. Download and open any root explorer app on your rooted device.
  2. Copy the Apk then go to system >app and grant permissions to the app.
  3. You will see App installed on your device.

Using Lucky Patcher

  • Download, install and open Lucky Patcher (Google Search to Download File)
  • Tap the option Toolbox
  • Click Patch to android
  • Check “Signature Verification status always true” and “Disable apk Signature Verification” and Apply.
  • Reboot your device if not automatically rebooted.

9. Clear Storage/Set Path

Clear some storage space on the device. Make sure SD Card has properly mounted if the file in located in SD Card.
I also recommend downloading the file in internal storage as downloading some types of APK files in external storage may sometimes cause issues due to improper read by package installer of Android OS.
Download the file from any other source in case the file itself is corrupted.

10. Other Miscellaneous Fixes

  • Delete .android_secure/smdl2tmpl.asec file from your SD Card.
  • Reboot the phone and even remove the battery if possible.
  • Uninstall all previous versions of the app or apps with same resemblance currently installed on your device.
  • Remove the SD card and also do not connect your device to a PC while you install the apk.
  • Free up some space, uninstall unnecessary apps.
Note & Conclusion: If the above post couldn’t solve the problem then you need some coding in Android SDK to checkapplicatioId the build.gradlefile is unique.
I hope the post was helpful to resolve the issue of App Not Installed Error. Do comment below for any assistance if needed.
repost from : https://www.digitbin.com/app-not-installed-fix-error/

Senin, 27 Agustus 2018

SOLUSI RAM Laptop HP 1000 Usable 929 MB


Baru nemuin kasus ini di dunia servis menservis.to the point aja, kebetulan laptop yang saya tangani adalah tipe :

HP 1000-1109TU 


solusinya cuma upgrade BIOS dari Versi sebelumnya ( yang saya tangani versi F.22 ) ke Versi F.46 (bukan Valentino Rosi lho yaaa... :p

silakan langsung menuju link ini untuk download file BIOS-nya : klik disini

setelah selesai download, langsung aja eksekusi file .exe-nya. pastikan charger tercolok yaa...
laptop akan restart sendiri dan menyelesaikan proses. setelah kembali masuk ke Desktop, silakan cek di System Properties... Insya Alloh Usable-nya sudah normal.

terimakasih. sukses selalu.


Sabtu, 09 April 2016

Cara Membuat, Setting Ukuran, dan Ngeprint Label Undangan


Cara Membuat, Setting Ukuran, Print Label Undangan. Sebagaimana tertera dibagian judulnya, pada kesempatan kali ini admin akan sekilas memberikan tutorial tentang cara membuat, setting ukuran, maupun ngeprint label undangan. Sebagian besar kawan-kawan sekalian mungkin sudah tau caranya, namun bisa jadi beberapa lainnya belum memahami betul sehingga tak ada salahnya donk berbagi hal tentang label undangan dikesempatan ini.
Sebelum lebih lanjut, sebenarnya admin lagi bingung aja mau nulis apa karena lagi ngeblank. Tapi sekilas tersirat tentang cara membuat, setting ukuran, dan ngeprint label undangan yang biasanya digunakan pada sebuah kartu pernikahan, dll. Nah hal ini juga dapat dijadikan sebagai pemasukan tambahan, sapa tau ada teman atau saudara kalian yang ingin menikah lalu perlu mencetak nama para undangannya namun bingung mau minta tolong siapa.
Okeh langsung aja ya, pertama-tama, kalian siapkan dulu peralatan tulis seperti penggaris, dan juga kertas label undangan yang akan digunakan. Kemudian ukur panjang serta lebar kertas, tanpa terkecuali panjang lebar label. Silahkan cek gambar dibawah ini.
Spesifikasi dan Harga ASUS Zenfone 6 Terbaru September 2014
Indonesia Terkini Ukuran Label Undangan
Keterangan gambar diatas :
1. Side Margin
2. Top Margin
3. Panjang label
4. Lebar label
5. Panjang kertas
6. Lebar kertas
7. Vertical pitch
8. Horinzontal pitch
Setelah kalian ukuran berbagai ukuran terkait dengan label undangan sebagaimana terpapar pada keterangan diatas, silahkan buka aplikasi Microsoft Word, lalu cari dan klik tulisan 'Mailings' selanjutnya 'Label'. Kemudian muncul tampilan baru, klik tulisan options, cari tulisan new label dan diklik. Pada bagian 'Page Size', pilih 'Custom' serta isi semua kolom tersedia terkait dengan ukuran label undangan sebagaimana telah kalian ukur sebelumnya trus klik 'Ok'. Cek urutan gambar dibawah ini.
Cara Membuat Label Undangan
Indonesia Terkini Tutorial 1

Cara Setting Ukuran Label Undangan
Indonesia Terkini Tutorial 2

Cara Print Label Undangan
Indonesia Terkini Tutorial 3

Semoga tampilan gambar diatas tidak membingungan kawan-kawan semua. Oh ya hampir lupa, pada lembar 'Label Details', tulisan 'Number Across' diisi dengan jumlah pengulangan label undangan kesamping yang kalian inginkan, serta 'Number Down' merupakan jumlah pengulangan kebawahnya. Dan tutorial ini pengisian nama serta alamat undangan dilakukan secara manual sedangkan jika ingin cara otomatisnya ditambah dengan penggunaan Excel (nanti dilain waktu diusahakan dishare juga). Lalu bentuk maupun ukuran huruf bisa kalian rubah sesuai keinginan selanjutnya tinggal tekan CTRL+P atau diprint. Silahkan dicoba, kalau ada kesulitan maupun tambahan boleh disampaikan lewat kolom komentar.
copas dari : http://indonesiakuterbaru.blogspot.co.id/2014/09/cara-membuat-setting-ukuran-print-label-undangan.html

Jumat, 06 Juni 2014

Cara Flash BIOS Laptop Compaq atau HP


berbagi adalah sesuatu yang sangat penting buat kita untuk menambah wawasan dalam dunia tehnik komputer yang semakin canggih,disamping itu juga klo kita pelit akan ilmu pengetahuan kapan kita bisa maju seperti negara-negara lain. nah maka tampa panjang lebar x ja ada yang perlu silakan dicoba

Matinya laptop CQ40 ini disebabkan oleh downgrade BIOS yang mengalami kegagalan sehingga terjadi kerusakan di BIOS laptopnya. Dan akibatnya Laptop Mati tidak keluar tampilan dengan led power dan wifi tetep menyala. Jangan Panik dulu,…. Jika anda mengalami hal ini, tapi bagaimanapun saya dulu juga panik ……. Jadi harus nanya sana sini

1. Download BIOS di situs resminya. PENTING : BIOS harus sama persis, misalnya CQ40-717TU, berarti anda harus download BIOS CQ40-717TU. Dan CQ40-717TU tidak sama dengan CQ40-717TX. Kalo untuk laptop CQ40 anda dapat mendownloadnya disitus resminya 
Biasanya judul filenya "WinFlash for HP Notebook System BIOS - Microsoft Windows-Based"
2. Siapkan Flasdisk kosong, kalo kemarin saya menggunakan flashdisk 2Gb Kingston. Ingat kosngkan dulu flashdisk anda agar prosesnya nanti berjalan lancar.

3. Extract file BIOS hasil download yang berupa .exe dengan menggunakan programWinRar atau 7ZIP.

4. Cari file yang berekstensi .FD misalnya 30F7F04.FD, pilih salah satu (biasanya ada 4 file dengan ekstensi .FD), misalnya saya memilih 30F7F04.FD. Kemudian sisakan 4 huruf pertama yaitu 30F7 kemudian tambahi dengan ekstensi . BIN sehingga menjadi 30F7.BIN.

5. Jadi file 30F7F04.FD menjadi 30F7.BIN, kemudian simpan file 30F7.BIN itu ke flashdisk.

6. Lepaskan CHARGER dan BATERAI dari laptop. Ingat baterai harus di lepas.

7. Colokkan flashdisk yg ada file xxxx.BIN

8. Tekan dan tahan tombol keyboard Windows dan B

9. Pasang Charger, tombol Windows dan B jangan di lepas dulu.

10. Nyalakan laptop dengan menekan tombol power Laptop

11. Tahan tombol windows dan B sampai terdengar bunyi “ beep ”, kemudian lepaskan kedua tombol itu. Laptop secara otomatis mencari BIOS asli ini ditandai dengan led flashdisk yg kedip2x.

12. Bunyi beep akan terdengar berulang tiap 2 detik, biarkan saja, laptop akan mati sendiri secara otomatis setelah selesai merestore / merecovery BIOS.

13. Selesai. Untuk mencobanya nyalakan laptop seperti biasanya dengan hanya menekan tombol powernya.

14. jika anda mengalami kegagalan, coba lagi dan coba dengan flashdisk yang lain, ingat…… flashdisk harus kosong untuk memudahkan laptop mencari file BIOS yang akan di restore atau direcovery.

slamat mencoba smoga bermanfaat.

source : http://jexsphikun.blogspot.com/

Selasa, 20 Mei 2014

Windows 7, Xp, Dan Hiren's Ke Dalam Flash Disk


Untuk menggabungkan Hiren’s BootCD, Windows XP, dan Windows Vista/7 ke dalam satu flash disk, ikuti cara berikut:


Yang perlu disiapkan:

1. Hiren’s BootCD (disarankan versi 9.7 keatas)
2. CD Installer Windows XP (rekomendasi SP3)
3. DVD Installer Windows Vista/Windows7
4. USB_MultiBoot_10
5. GRUB4DOS


Langkah-langkahnya:
Integrasi Windows XP
    1. Ektsrak USB MultiBoot 10 ke hardisk (mis di C:\USB_MultiBoot_10\). Masukkan CD Windows XP kedalam CD/DVD drive atau mount dengan PowerISO atau DaemonTools.
    2. Colokkan FD USB kemudian dari dalam folder USB_MultiBoot_10, jalankan file USB_MultiBoot_10.cmd.
    3. Akan muncul jendela prompt Windows, tekan sembarang tombol untuk mulai (Press any key to continue…).
    4. Berikutnya adalah memformat flash disk USB. Ada 2 tool yg disediakan untuk memformat flash disk anda:
      • PeToUSB : flash disk masimal 2GB, dgn system file FAT.
      • HP USB Disk Storage Format Tool : Flash disk diatas 2GB dgn system file FAT & NTFS.
      Pilih jenis tool utk format FD-nya (saya pake HP USB Disk Storage) lalu tekan tombol “H” & tekan ENTER.

    5. Pastikan nama Flash disk USB sdh tertera pada kotak Device HP USB Disk Storage Format dan pilih system file NTFS supaya proses instalasi dari FD jauh lebih cepat. Kalau sudah siap, tekan tombol Start. Tekan tombol Yesuntuk pertanyaan message-box dari tool HP USB.
    6. Kalau proses format sudah selesai, klik tombol “Close”dan anda akan diantar ke jendela berikut:
    7. Tekan angka “1” pada keyboard lalu tekan ENTER. Pilih lokasi drive Windows XP.
    8. Klik tombol Yes pada kotak Unattended Install ? – XP Setup UserData in winnt.sif and $OEM$yg muncul. Selanjutnya silakan isi informasi nama user, organisasi, product key XP, nama komputer, password, dsb sama seperti melakukan instalasi normal dari CD installer XP. Jadi, nanti tidak perlu lagi mengisi data2 instalasi saat menginstal XP dari Flash disk.
    9. Selanjutnya tekan angka “2” lalu ENTER. Pilih lokasi drive FD.
    10. Ketik angka “3” lalu tekan ENTER untuk mulai menyalin file2 instalasi XP kedalam FD. Baca kotak2 pertanyaan yg muncul dan iyakan saja.
    11. Tahap pembuatan instalasi XP USB sudah selesai, tekan “Q” untuk menutup USB_MultiBoot_10.cmd.
  • Integrasi Hiren’s BootCD
    1. Masukkan/mount CD/ISO Hiren’s dalam drive CD/DVD-ROM.
    2. Copy folder HBCD dan file autorun.infdari dalam drive Hiren’s BootCD kedalam FD.
    3. Ekstrak file grub4dos.zip yang sudah didownload, kemudian copy filegldr dan file menu.lstdari hasil ekstraksi tsb kedalam FD.
    4. Sekarang, FD USB multiboot sdh jadi dengan Windows XP dan Hiren’s BootCD didalamnya. Tinggal mengatur BIOS PC/laptop supaya bisa booting dari USB FD.
  • Integrasi Windows 7/VistaCopy semua isi DVD Windows 7/Vista kedalam FD. Buka file menu.lstdalam FD dengan notepad lalu tambahkan baris berikut didalamnya:
    Code:
    title Windows 7
    root (hd0,0)
    chainloader /bootmgr
Selesai!! Special thanks for narcophilia for this tutorial info.

source : http://d4rwis.blogspot.com

Sabtu, 17 Mei 2014

MENGENAL BLUE SCREEN PADA WINDOWS


Belajar Mengenal Blue Screen Pada Windows


Pernahkah kalian mengalami sewaktu mengerjakan laporan pekerjaan, browsing di internet, ataupun sedang bermain game kesukaan, tiba-tiba Laptop anda restart dengan sendirinya, dan kemudian ketika sedang boot ulang tiba-tiba hanya bluescreen yang anda dapatkan dengan beberapa Informasi yang tertera.
Bluescreen disebut juga Bluescreen Of Death (BSOD) adalah istilah yang dikenal luas untuk layar yang ditampilkan sistem operasi windows ketika mengalami kesalahan sistem (atau disebut stop error oleh windows).

Diambil dari wilkipedia Blue screen of death (BSOD, Bahasa Inggris: Layar Biru Kematian), atau kadang disebut "layar biru" (bluescreen) saja adalah istilah populer untuk layar yang ditampilkan Microsoft Windows ketika mengalami kesalahan sistem (atau disebut stop error oleh Microsoft). BSOD milik Windows NT, 2000, XP, Vista, 7, maupun Windows 8 biasanya lebih serius daripada Windows sebelumnya. Ada beberapa hal yang menyebabkan munculnya BSOD ini. Diantaranya driver peralatan yang tidak bagus, kesalahan memori, registry yang rusak atau penggunaan file DLL yang tidak cocok.

Berbagai bentuk BSOD terdapat pada seluruh sistem operasi Windows sejak Windows 3.1. BSOD merupakan pengganti black screen of death (layar hitam kematian) yang muncul pada OS/2 dan MS-DOS. Dalam versi awal dari Windows Vista juga terdapat red screen of death atau layar merah kematian, yang digunakan pada kesalahan boot loader.

Blue Screen ini merupakan salah satu troubleshooting yang sering terjadi pada komputer yang mengakibatkan kinerja dan performa Komputer anda terasa lambat dan berat dan kemudian mengakibatkan Windows Crash serta terjadi Bugs yang akhirnya menyebabkan komputer anda tidak bisa masuk ke Windows. Anda jangan tergesa-gesa dan terburu-buru langsung Menginstall Windows XP atau bawa langsung ke Tukang servis. Selidiki pesan Error yang di tampilkan oleh Blue Screen Tersebut.

Pesan Error yang terdapat di Blue Screen disimpulkan sebagai berikut:

1. IRQL_NOT_LESS_OR_EQUAL (0X0000000A)
Error ini yang paling sering muncul pada saat terjadi Blue Screen.
Pesan kesalahan ini biasanya disebabkan kerena ada ketidakcocokan driver yang terinstall di komputer.
Penyebabnya :
Adanya Install Driver Yang bentrok satu sama lain
Kesalahan pada video Card, karena di overclock melebihi batas atau mengganti video card baru sementara driver video card lama tidak di unistal
Kesalahan pada Audio Card, tidak tepat mengkonfigurasi atau bug dalam driver sound card

2. NTFS_FILE_SYSTEM atau FAT_FILE_SYSTEM (0X00000024) atau (0X00000023)
Pesan ini memberitahukan adanya kesalahan dalam pengecekan koneksi terhadap Hardisk. Biasanya muncul apabila :
Adanya salahsatu file system terkena serangan virus
Bila di sektor penyimpanan file system terjadi bad sactor
Pada saat booting hubungan dengan hardisk terputus.

3. UNEXPECTED_KERNEL_MODE_TRAP (0X0000007F)
Bila Anda mendapatkan pesan error seperti ini, dapat disebabkan karena:
Overclock Hardware yang berlebihan
Komponen komputer yang terlalu panas
BIOS yang korup
Memory dan CPU yang cacat

4. DATA_BUS_ERROR
Pesan kesalahan ini kemungkinan disebabkan kesalahan pemakaian memory. antara lain :
Memory rusak
Pemasangan atau penambahan memory yang tidak cocok
Memory kard yang di pasang tidak tepat pada slotnya (Kendur)

5. PAGE_FAULT_IN_NONPAGED_AREA
Pesan error ini disebabkan karena adanya kerusakan hardware, termasuk memory utama, memory video card, atau memory di processor (L2 Cache)

6. INACCESSIBLE_BOOT_DEVICE
Pesan error ini disebabkan karena adanya kesalahan dalam konfigurasi jumper harddisk yang salah, virus boot sector, driver IDE controller yang salah, atau kesalahan driver chipset.

7. VIDEO_DRIVER_INIT_FAILURE
Pesan error ini disebabkan karena adanya Kesalahan terjadi pada instalasi driver video card yang kurang sempurna, restart pada saat instalasi atau juga dapat terjadi karena kesalahan dalam instalasi driver.

8. BAD_POOL_CALLER
Pesan error ini disebabkan karena adanya Kesalahan ini dapat terjadi karena kesalahan atau driver yang tidak kompatibel. Sering terjadi saat melakukan instalasi XP dari upgrade, atau bukan dari instalasi baru.

9. PEN_LIST_CORRUPT
Pesan error ini disebabkan karena adanya kerusakan RAM

10. MACHINE_CHECK_EXCEPTION
Pesan error ini disebabkan oleh cacatnya CPU, atau yang di overclock secara agresif, serta power supply yang kekurangan daya atau rusak.

Peringatan : jika di paksakan menginstall atau Format Windows XP tanpa mengabaikan Pesan Error Blue Screen maka Windows setelah selesai di Install tidak lama kemudian akan menjadi Crash dan BlueScreen kembali.

source : http://sambores.blogspot.com

Sabtu, 05 November 2011

“Ink Absorber is Full”, Canon MP258

Not just counting how many times the printer is done printing, the printer also calculate how many times do the head cartridge cleaning, and ink absorber on the printer you will be considered full at a later time. Error code at the beginning was the E8 and then will turn into E27.
 Ink Absorber is Full, Error E27 on Canon MP198/MP258
The following is the step by step how to reset error “Ink Absorber is Full” with error code E8 of E27 on Canon printer model MP198 and MP258 (or may be also work on MP270):
  1. Power cable have been installed and the printer is turned off.
  2. Press and hold the STOP/RESET button, then press and hold the POWER button.
  3. Release the STOP/RESET (POWER button should not be released).
  4. Press STOP/RESET 2 (two) times, then release the POWER button.
  5. Let the indicator light green blinks until the printer head stopped moving. And LED panel shows the number of ZERO.
  6. The computer will detect new hardware, just ignore them.
  7. This situation indicates that the printer MP198/MP258 is in a SERVICE MODE state and ready to reset. Don’t do anything to the printer, you just need prepare the papers onto the printer paper’s tray.
Now, go to your computer. Follow the following steps:

  1. Prepare the Canon Service Tool, download from HERE.
  2. Run the Canon Service Tool
  3. Click “MAIN“, then the printer will process, then will print one page with the words “D = 000.0 and ….”
  4. Click the “EEPROM Clear“.
  5. Then click the “EEPROM“, and the printer will print the results of the reset process. One of the writing row  will be: “TPage(TTL=00000 COPY=00000)”
  6. Turn off the printer by pressing the POWER button and turn on your print to start print. Your printer should be OK now.
reset ink absorber MP258 Ink Absorber is Full, Error E27 on Canon MP198/MP258


source : here

Selasa, 25 Oktober 2011

Cara Reset, Resetter Printer Epson Stylus T20E Blinking

Cara Reset Epson Stylus T20 secara Software " TERBARU "

1. Langkah pertama tentunya printer harus sudah terinstall drivernya. Untuk Download drivernya klik download driver epson .

2. Download software resetter Epson T20 dulu. Software bernama Resetter Epson Stylus T20, anda dapat download di sini Klik

3. Tanggal komputer tidak perlu dirubah seperti resetter sebelumnya.

4. Jalankan program resetter Epson T20 dengan double klik "AdjProg.exe"

5. Kemudian ikuti gambar berikut ini :


"Check : digunakan untuk cek counter yang maksimal 7800 point, anda dapat melihatnya di main pad counter. Kalau lebih atau mendekati 7800 point berarti printer perlu di reset"

"Initialization : digunakan untuk mereset atau mengenolkan kembali counter printer"

6. Setelah selesai matikan printer kemudian nyalakan lagi. Printer akan nyala dengan lampu berwarna hijau penuh. Berarti printer Epson Stylus T20 yang blink tadi sudah siap digunakan kembali.

Selamat mencoba............ Semoga Bermanfaat...... 


source : ekohasan

Reseter Canon MP258

This is the latest resetter for canon MP198, MP258, MP276, MP496, MP558, MP568, and MP648.

The following are the steps that must be done:


  1. Turn on the printer to service mode. how to enter service mode is :
  • While the printer is OFF, press and hold the Start/Stop button (Resume/Cancel in some other models).
  • While holding the Start/Stop button, press and hold the POWER button.
  • When the POWER LED (green light) lit, release the Start/Stop button (still holding the POWER button).
  • Press the Start/Stop button TWICE (still holding the POWER button)
  • Release the POWER button.
  • Wait for the LCD to display 0 (zero).
  1. After the display is 0, attach the printer usb cable to pc, then there will be detected new device (it's normal)
  2. Run service_tool 1050.exe
  3. Confirm detected usb-port numbers on usb port column.
  4. Click the MAIN ink counter reset button, make sure there is paper in the paper feed, because the printer will print after the process is complete.
  5. Click platern ink counter reset button, the printer will print again.
  6. Turn off the printer.
  7. Your printer is ready for use again.


HERE IS THE DOWNLOAD LINK


source : indoreset

Sabtu, 22 Oktober 2011

TUTORIAL RESETTER PRINTER CANON PIXMA iP1200 iP1600 iP2200


Resetter iP1200, iP1600, iP2200 merupakan satu software yang bisa dijalankan pada Windows XP.
Salah penggunaan software akan menyebabkan seri printer berubah dan atau alamat data didalam EEPROM cacat (defect) dengan efek kegagalan inisialisasi pada saat pertama dinyalakan setelah reset dan atau nilai counter tidak valid.

Sebelum menggunakan Software Resetter Canon iP1200 iP1600 iP2200, pastikan dahulu Driver Printer yang akan di reset telah terinstall, dan pastikan bahwa USB Printer terpasang dengan baik.

1. Cara bikin printer normal (reset sementara)

 
• Lepas kabel power.
• Tekan tombol power printer, pasang kembali kabel power (dgn aliran listrik) tanpa melepas tekanan pada tombol power printer.
• Tekan tombol resume (di bawah tombol power) sebanyak 2 kali (tombol power jangan dilepas dulu).
• Lepaskan tekanan pada power printer. Tunggu sampai lampu warna hijau dan tidak berkedip.
• Printer telah NORMAL kembali ( untuk sementara, dan akan kembali blink bila kabel power/aliran listrik dimatikan/dilepas.) 


2. Untuk jalankan program. (reset permanent)

 
• Pastikan Software Resetter Canon iP1200 iP1600 iP2200 telah Anda miliki dan berada pada komputer Anda, bila belum bisa Anda dapatkan DISINI.
• Pasang kertas sebanyak 3 lembar untuk hasil TEST PRINT
• Buka Folder Software Resetter Canon iP1200 iP1600 iP2200 yang ada pada komputer Anda dan buka file General Tool.
• Pilih USB pada menu USB PORT disebelah kanan atas. (Point 1)
• Centang / klik pada kolom EEPROM CLEAR. (Point 2)
• Pada Menu SET DESTINATION, klik dan pilih iP1200 atau iP1600 atau iP2200 sesuai dengan tipe printer yang akan direset (bila pilihan SET DESTINATION tidak aktif langsung ke menu CLEAR WASTE INK COUNTER klik MAIN dan PLATEN). (Point 3)
• Pada Menu CLEAR WASTE INK COUNTER pilih MAIN. (Point 4)
• Pada Menu CLEAR WASTE INK COUNTER pilih PLATEN. (Point5)
• Pada Menu TEST PRINT pilih TEST PATTERN 1. (Point6)
• Pada Menu TEST PRINT pilih TEST PATTERN 2. (Point7)
• Pada Menu TEST PRINT pilih TEST PATTERN 3. (Point8)
• Setelah selesai hasil test Print, matikan printer dan cabut kabel power printernya untuk penyimpanan reset data EEPROM pada printer
• Pasang kembali kabel power dan hidupkan printer. Tunggu sampai printer selesai initialing dan.....printer tidak ngeblink lagi


ERROR BLINKING LED Canon iP1200 iP1600 iP2200

Error Blinking Orange Canon iP1200 iP1600 iP2200
2x No paper
3x Paper jam
4x No ink
5x The ink cartridges are not properly installed, or a non-supported
ink cartridge is installed
7x Ink cartridge not installed
8x Waste ink absorber full or platen waste ink absorber full warning
(approx. 95% of the maximum capacity)
14x Non-supported ink cartridge installed
16x Used ink cartridge installed, or no ink


source : here

Jumat, 30 September 2011

Mengenali Suara Hardisk

Sebagaimana perangkat yang lain, Hardisk komputer atau Laptop yang kita gunakan juga mempunyai umur. Jika sudah cukup lama kadang Hardisk mengeluarkan suara tertentu. Nah jika Hardisk kita sudah mengeluarkan suara (aneh) tertentu dan masih bisa digunakan/akses, sebaiknya data-data penting segera diamankan, misalnya dengan backup data ke media lainnya.

Hampir semua hardisk mengeluarkan suara yang berbeda jika Hardisk ini sedang bermasalah atau sudah mendekati umurnya, tetapi setiap vendor Hardisk biasanya mengeluarkan suara yang berbeda. Bagaimana kita mengetahui suara aneh ini di Hardisk yang kita gunakan ?


Sebuah perusahaan (jasa) Data Recovery, DataCent telah membuat sebuah database yang berisi berbagai suara Hardisk yang bermasalah atau sudah sampai umurnya. DataCent menyertakan berbagai merk Hardisk populer seperti : Western Digital, Seagate, Maxtor, Samsung, Hitachi/IBM, Toshiba, Fujitsu serta Quantum.

Pilih jenis Hardisk sesuai dengan Merk atau vendor yang kita gunakan, kemudian coba dengan beberapa suara yang ada disana. Jika Hardisk kita bersuara mirip dengan apa yang ada di Data Cent, maka segera Backup Data-data penting yang ada di hardisk, karena kemungkinan hardisk sudah mengalami kerusakan (silahkan lihat deskripsi detailnya di Hard drive sounds).


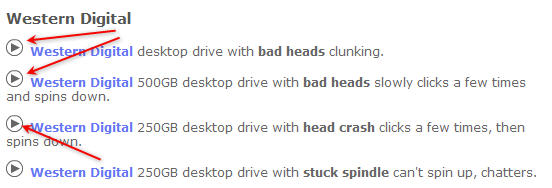
Untuk mendengarkan suara, klik saja icon (gambar segitiga) yang ada di setiap vendor Hardisk dari website DataCent.
Jika data sudah di backup, untuk mengatasi hardisk yang bermasalah ini, mungkin bisa dicoba dengan mem-format penuh hardisk tersebut, dan lihat hasilnya. Jika ternyata suara aneh masih tetap terdengar, maka siap-siap untuk mengganti dengan hardisk yang baru.
Jika belum tahu apa merk atau vendir Hardisk yang kita gunakan, maka kita bisa menggunakan sofware gratis seperti misalnya Speccy.

(ebsoft via lifehacker)

Source : here